
Multiversal Piece Controls, Settings and Auto Farm
Open the gear in the left-side menu to change skill keys, tune graphics and sound, or set up automatic attacks in Multiversal Piece. The same menu lets you save an AFK return point and restore missing mobile buttons.
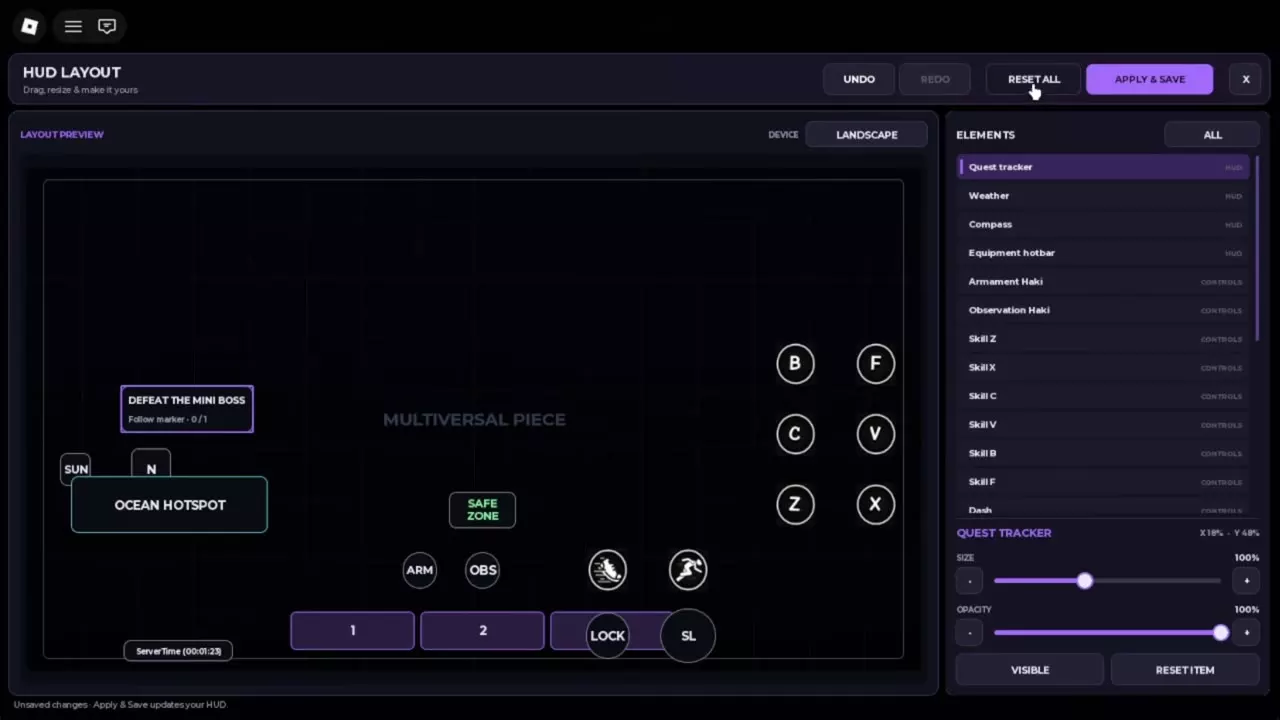
Equip a combat slot, get within attack range, and switch M1 to ON on the combat HUD. Use Setting → AutoSkill to pick which skills cast automatically, and enable both quest repeat switches to restart repeatable quests without a prompt. For lower graphics load, look under Performance. To save an AFK spot, use Save Location → CLICK ME and turn on AFK Mode. To recover missing mobile buttons, open HUD Layout → CUSTOMIZE, select RESET ALL, then APPLY & SAVE.
PC, Mobile, and Controller Controls
| Platform | Action | Control |
|---|---|---|
| PC | Move | WASD |
| PC | Interact | E at the prompt |
| PC | Cast a skill | Key shown on the HUD |
| Mobile | Cast a skill | On-screen skill button |
| Mobile | Dash, use Haki, or lock on | On-screen controls |
| Controller | Face the camera direction | Controller Shift Lock |
Select the weapon or ability in your hotbar to bring up its skills. Ready means the skill can be cast. If it’s on cooldown, wait for it to become ready again. On PC, get close enough to an NPC or station for its interaction prompt to appear before pressing E.
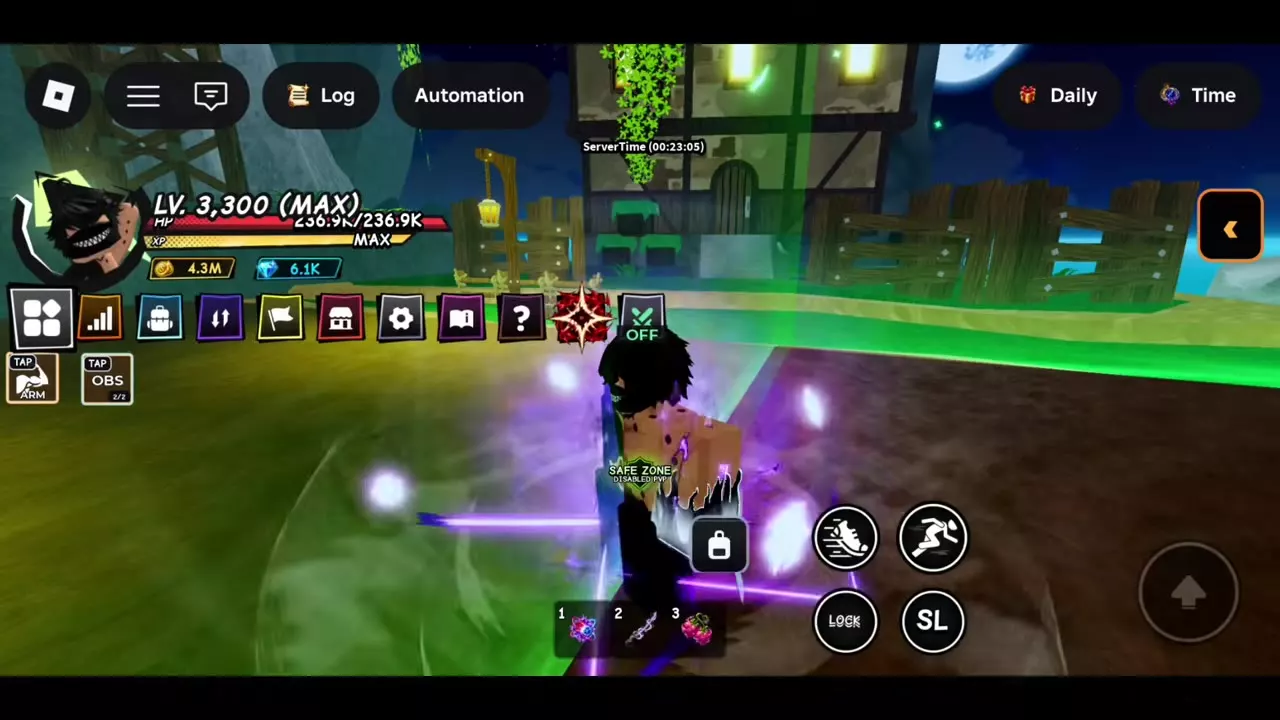
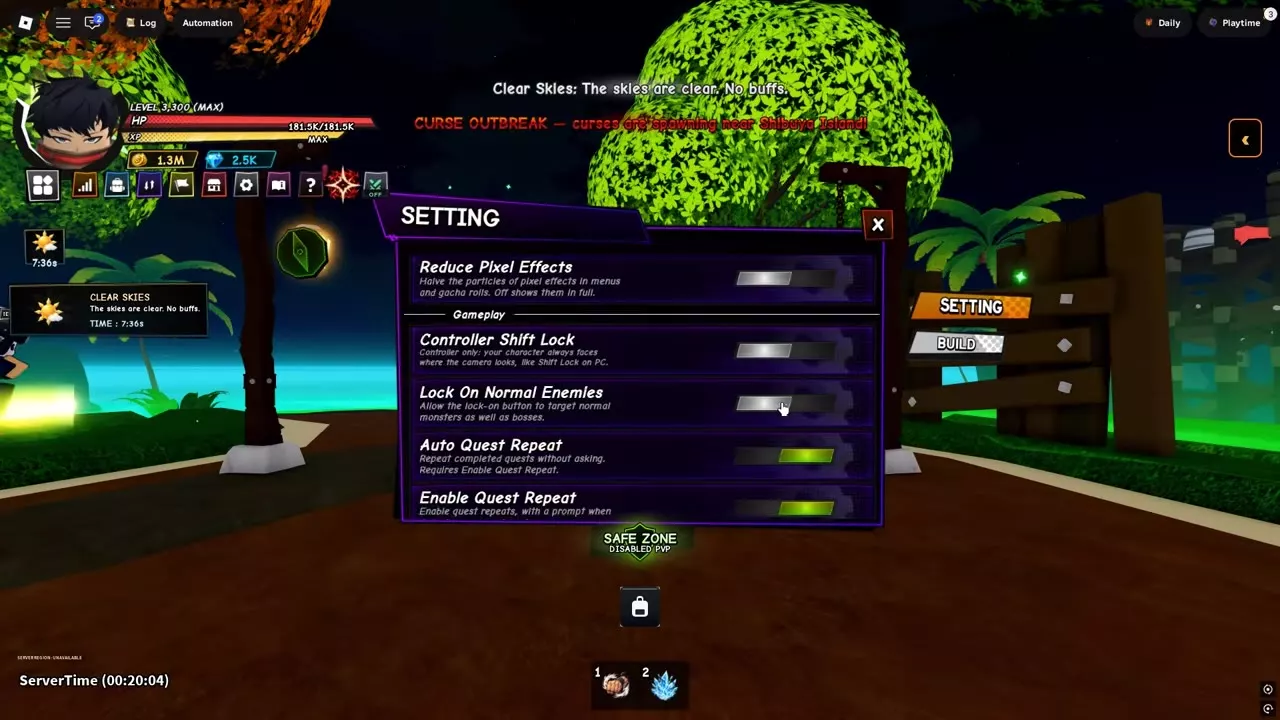
Expand the four-square menu on the left and select the gear to open Setting. Choose CLICK ME under Controls & Boss Alerts to change the PC skill bindings offered there, configure boss lock-on, or choose which boss spawns trigger alerts. In Gameplay, turn on Lock On Normal Enemies to let the lock-on button target regular enemies as well as bosses. Gamepad players can turn on Controller Shift Lock in the same area to keep their character facing where the camera points.
On first launch, SKIP in the lower right bypasses the opening animation. SKIP TUTORIAL is a separate button for the movement and quest tutorial.
Audio, Notifications, and Performance
Sound and on-screen information
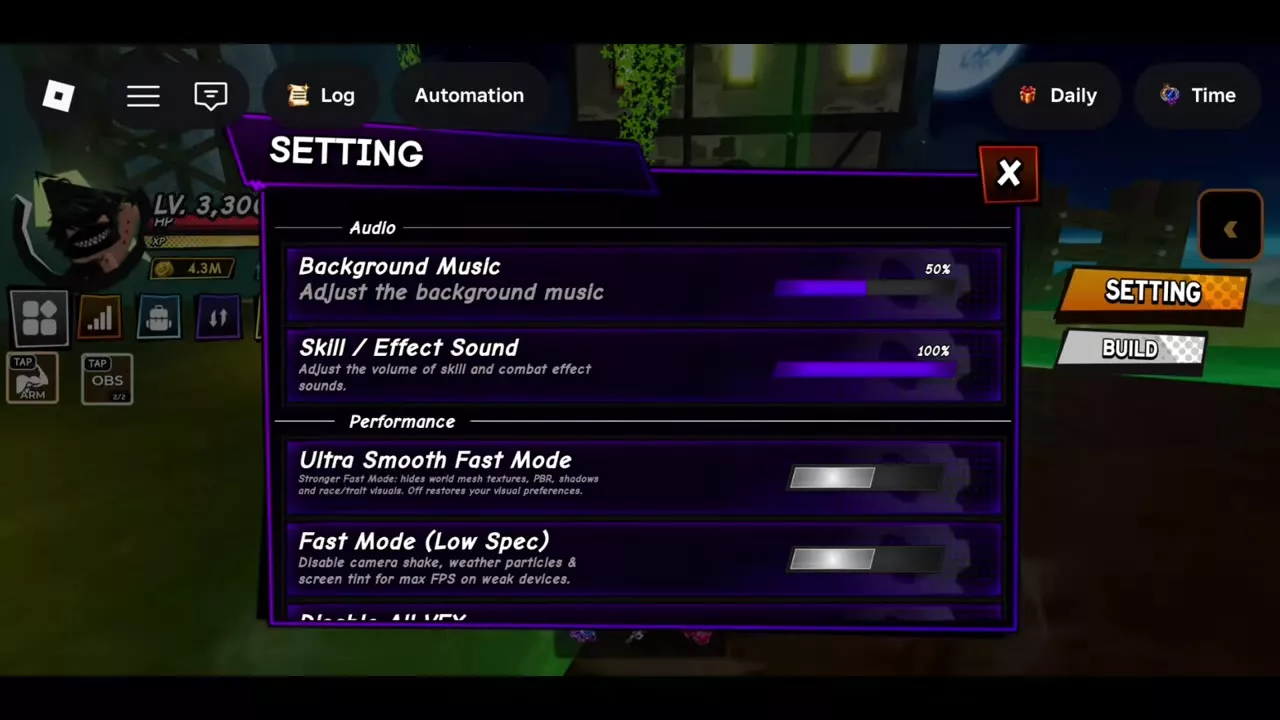
- Audio has separate sliders for Background Music and Skill / Effect Sound. Lower the music slider to keep combat sounds audible at their current volume.
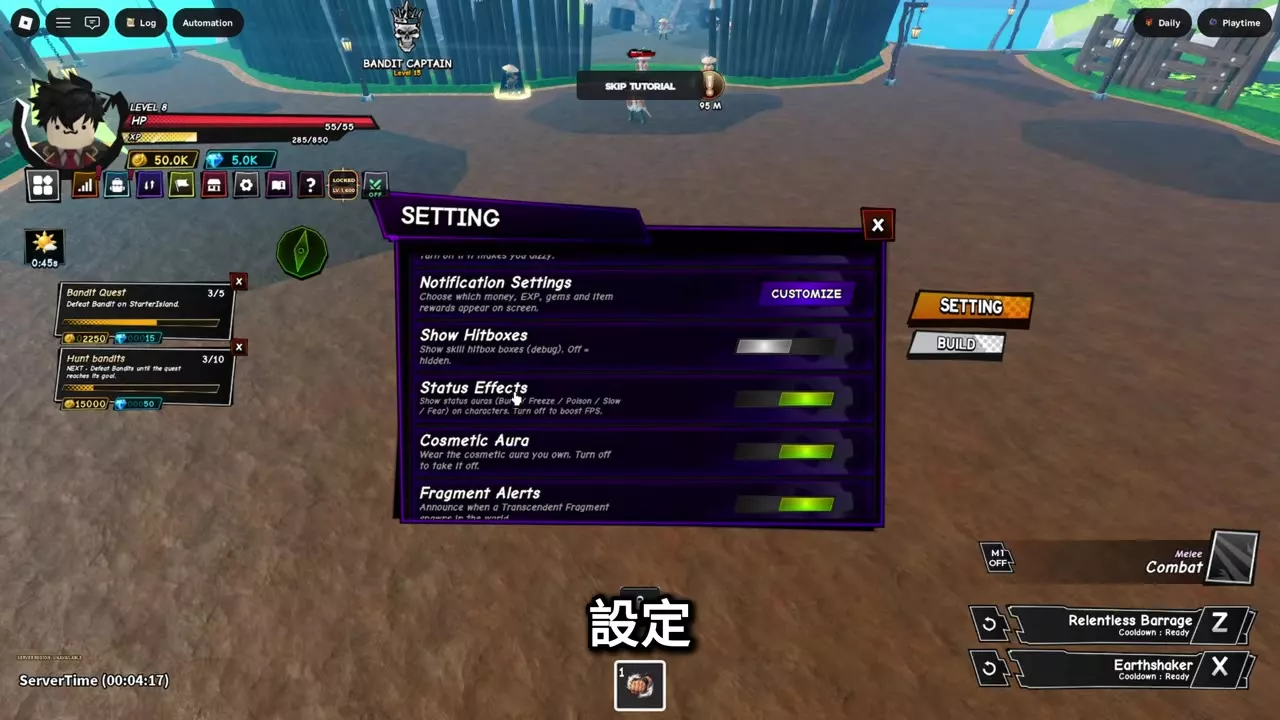
- Notification Settings → CUSTOMIZE lets you choose which Money, EXP, Gems, and item rewards appear on screen. Auto-open Daily Rewards opens the rewards panel when you join with a reward ready to claim.
- Damage Numbers puts floating damage values over hits. Combo Text shows damage and hit count. Show Hitboxes displays skill hitboxes. Player Nameplates shows names and health bars above other players, and Click Ripple adds a ripple where you click or tap the interface.
- Compass points toward the current quest objective. Progression Tips gives level-based suggestions such as Ki Surge and Skill Tree, with repeat reminders.
- Fragment Alerts announces a Transcendent Fragment spawn. Fragment Marker puts a floating marker at the fragment’s location. Turn on both if you want the spawn notice and a marker to follow.
Fast Mode and skill effects
| Setting | Visuals it hides |
|---|---|
| Fast Mode (Low Spec) | Shake, weather particles, screen tint |
| Ultra Smooth Fast Mode | Textures, PBR, shadows, race/trait VFX |
| Hide Others' VFX | Other players’ skill effects |
| Disable All VFX | Everyone’s skill effects |
Use Fast Mode (Low Spec) to reduce screen motion and weather effects together. Choose Ultra Smooth Fast Mode when you also want to simplify world materials and character visuals. Switching Ultra Smooth off restores your visual preferences. In crowded fights, start with Hide Others' VFX to keep visual feedback from your own casts. Disable All VFX offers the largest FPS gain among the skill-effect options and hides your own cast effects as well.
Individual visuals and animations
- Turn off Camera Shake if heavy hits or skills make the screen move too much. Weather Effects controls particles such as rain, snow, and embers. Color Correction controls the tint from weather, skills, cutscenes, and other screen effects.
- Status Effects controls the auras for Burn, Freeze, Poison, Slow, and Fear. Keep them visible to read those statuses on characters, or turn them off to reduce graphics load.
- Hide Race Effects hides race models, wing animations, and auras on your device while preserving race stats. Hide Trait Aura hides trait auras on your device while preserving trait stats and passives. Use Cosmetic Aura to put on or remove an aura you own.
- Reduce Pixel Effects halves pixel particles in menus and gacha rolls and reduces them in the AFK Lobby. Switch it off to restore the full effects.
- Disable Cutscene skips cutscene cameras during your own skills and when attacks hit you. You can keep moving if you’re caught, and damage stays the same. Instant Reroll Results skips the result animation while keeping the same cost, odds, and server cooldown.
Auto M1, AutoSkill, and Quest Repeat
Set up automatic attacks
- Equip and select the combat slot you want to use, then move within attack range of the enemies.
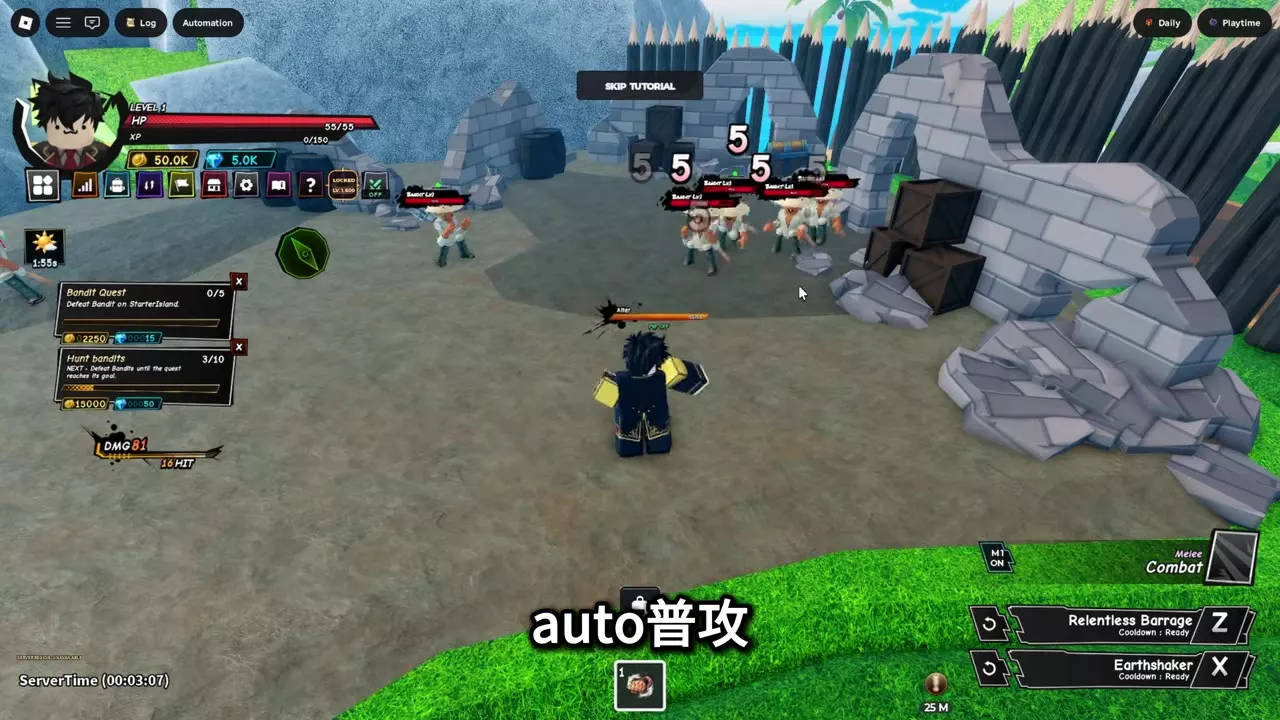
- Switch M1 to ON on the combat HUD, or open Setting → AutoSkill and enable Auto M1. It repeats basic attacks while your weapon is equipped without using an AutoSkill slot. Basic attacks pause while a menu is open or you’re typing.
- Under AutoSkill, turn on Auto Z Skill, Auto X Skill, Auto C Skill, Auto V Skill, Auto B Skill, or Auto F Skill for each move you want to cast automatically. Each switch controls the move bound to its own key.
With the starter Combat slot selected, try M1 ON near the Bandits on Starter Island and look for hits on enemies in range. Use basic attacks between skill casts when you’re close enough to hit. If you’re farming Jungle Island with Nightfall from range, use its ranged Z move and close the gap whenever you want basic attacks to connect.
Repeat a quest after completion
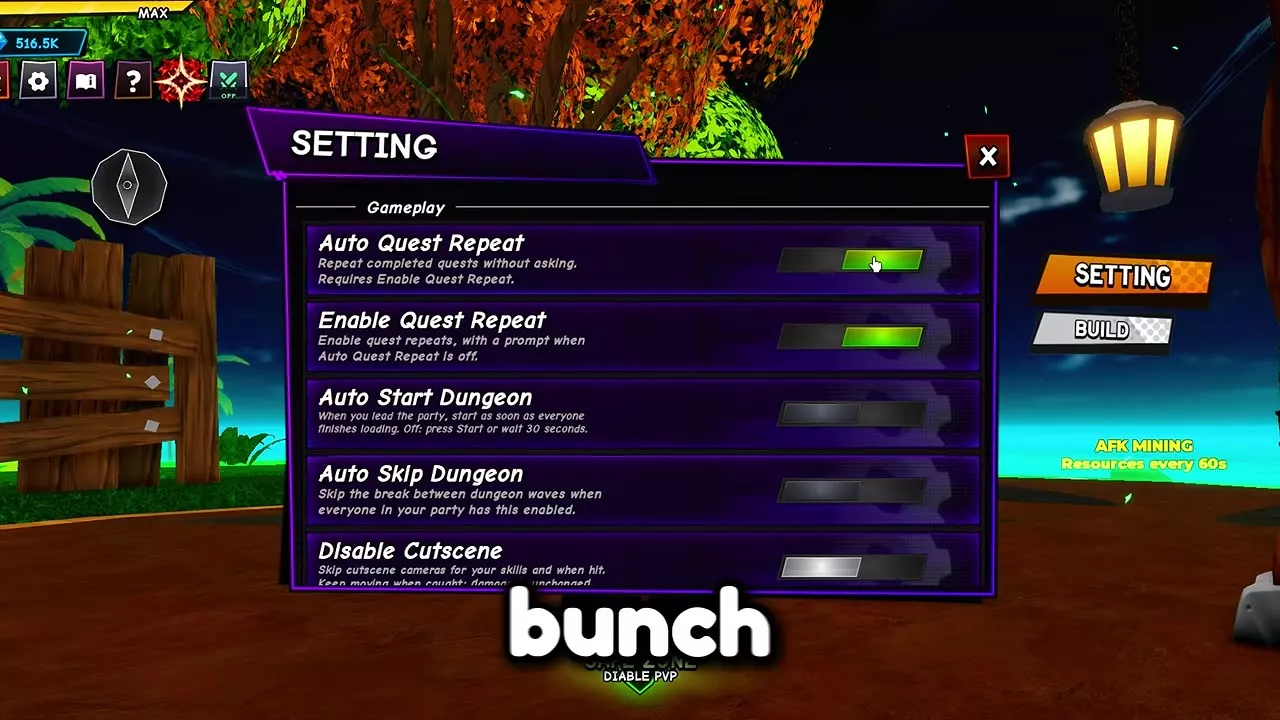
- Take a repeatable quest and open Setting → Gameplay.
- Turn on Enable Quest Repeat. When you finish the quest, you’ll get a confirmation prompt if Auto Quest Repeat is off.
- Turn on Auto Quest Repeat as well to restart the quest without the prompt.
Start a dungeon and skip wave breaks
In Gameplay, Auto Start Dungeon starts the run when everyone finishes loading if the party leader has it enabled. With it off, press Start or wait 30 seconds. Auto Skip Dungeon skips the break between waves when every party member enables it. Double Dungeon also has Auto Start and Auto Skip on its ready screen. Dungeon rooms, difficulties, and replay
Save an AFK Return Point
- Stand exactly where you want to return and equip the weapon you want to save.
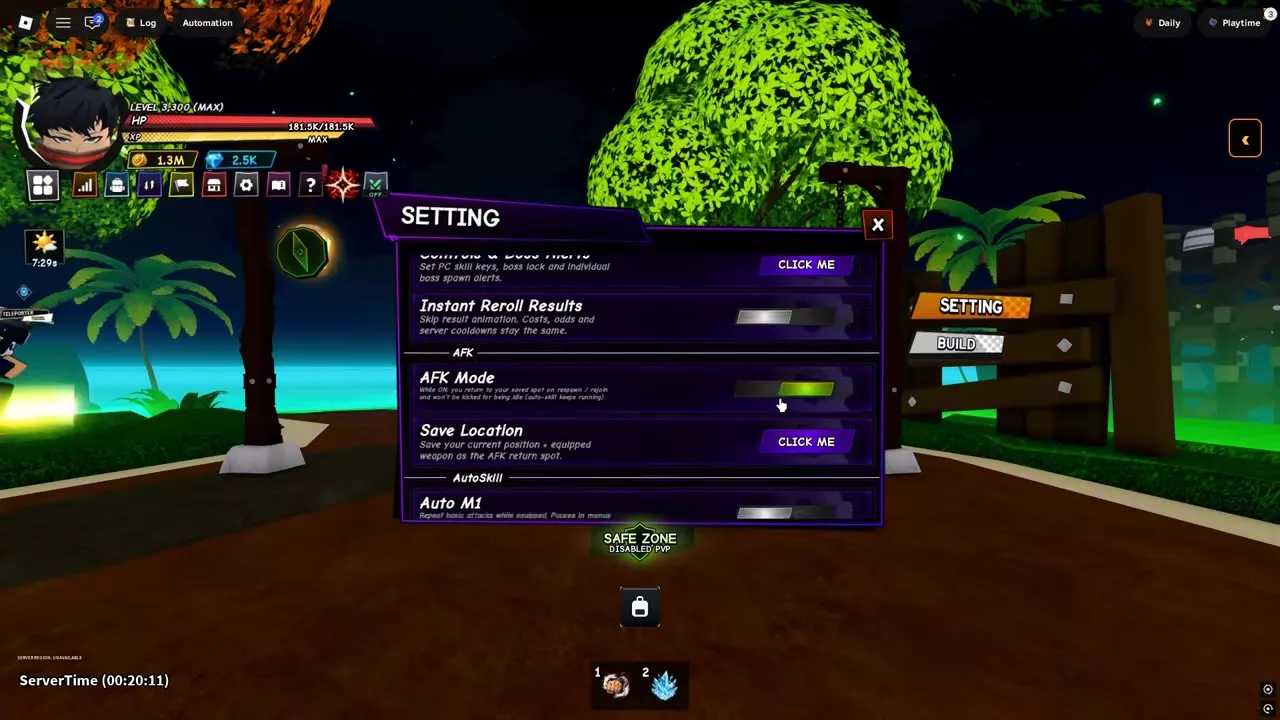
- Open Setting, scroll to AFK, and select CLICK ME under Save Location. This saves your current position and equipped weapon.
- Turn on AFK Mode. While it’s enabled, you return to the saved spot after respawning or rejoining. The mode prevents idle kicks and keeps any auto skills you’ve enabled running while you idle.
Use Set Spawn for your island respawn point. For passive rewards, enter the AFK Lobby or AFK Mining through its own activity entrance. AFK reward activities and payouts
Move or Restore Mobile HUD Buttons
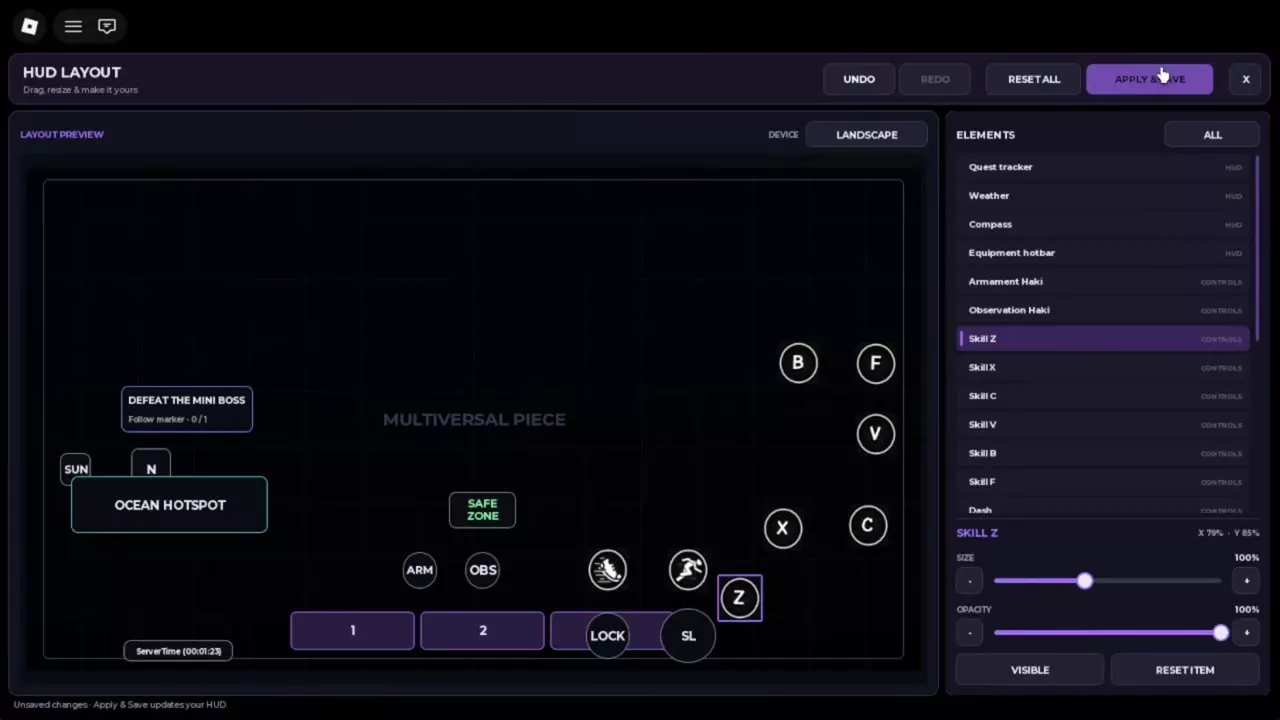
- Open Setting and scroll down to HUD Layout, just above CODES. Select CUSTOMIZE to open the LANDSCAPE preview.
- Drag an element to move it. For example, move Quest tracker away from the combat buttons, or drag Skill X closer to where your thumb rests. The ELEMENTS list includes Weather, Compass, Equipment hotbar, both Haki controls, Dash, and the Z, X, C, V, B, and F skill buttons.
- Select an element to change SIZE, OPACITY, or VISIBLE. Use RESET ITEM to restore the selected element to its default. Use UNDO or REDO to step through your edits.
- If several mobile controls are missing, select RESET ALL to restore the full default layout. In the preview, look for the six skill buttons and the ARM, OBS, LOCK, and SL controls.
- Select APPLY & SAVE to apply the layout and keep it when you rejoin. If the editor still says Unsaved changes, apply and save before closing it.
Haki, Dungeons, and Player Settings
- Automatic Haki. After unlocking the corresponding Haki, use the separate Auto Observation Haki and Auto Armament Haki switches under AutoSkill. Observation waits for its cooldown, and Armament can reactivate after respawn. Unlock and upgrade Haki
- Dungeon parties. Use the room controls on Solo Island to host or join a run. Set up wave breaks with the group before you start.
- Stat points. Auto allocation is under STATS, where you can turn on AUTO and choose which stats receive points. Set priorities and point amounts
- Player settings. PvP is opt-in. Both players must enable it to fight outside a Safe Zone. Use Ally to manage allies and open Trade from the Inventory sidebar. PvP, allies, and the Trade menu